


Chicken is highly regarded by chefs, cooks, nutritional specialists, doctors, and home cooks. The reasons are many, and varied. Chicken is economical, versatile, healthy, and easily prepared. Poultry figures prominently in world cuisine with dishes such as Chicken Marsala, Chicken Parmesiana, Chicken a la King, Chicken Cordon Blue, and more. But, there are some who are intimidated by this noble bird, because they do not understand how to cook a whole chicken.
Many people think that cooking a cut-up chicken is easier, but that is not necessarily true. There are many advantages to cooking a chicken whole:
- It is more economical. Chicken pieces are generally priced 30% more per pound, or even more, than whole chicken. In fact, whole chicken is probably the least expensive meat you can eat. On sale, sometimes whole chicken can be purchased for as little as .50 cents a pound. Dog Food costs more than that.
- It may seem like there is more waste to a whole chicken because of bones, the neck, gizzards and liver, but nothing could be further from the truth. The entire carcass, skin, fat, bones, liver, neck and gizzards can be boiled into delicious chicken stock, to be used in other recipes, to make gravy, and soups, and the liver, gizzards and neck can be broiled, baked or fried, and eaten by themselves.
- Whole chickens retain more moisture, are less prone to drying out, and retain more flavor than pieces.
- Whole chickens require less manual labor in preparation.
- Whole chickens can be cooked in more ways than pieces.
- Serving whole chicken is more elegant and impressive than pieces.
From a nutritional standpoint, chicken is an all-star. It has less fat, and cholesterol than any other meat except fish, is high in protein, and has no carbohydrates.
Any great chicken dish starts long before the bird gets anywhere near an oven or grill. You need to know how to select the best bird, proper care and handling, and safety tips. Chickens can be contaminated by e. coli bacteria, but proper selection, handling and cooking techniques reduce the risk to very near zero.
When selecting a chicken, only buy from a supplier you trust. Most reputable markets keep their coolers clean, and monitor temperatures closely. And stick to brand name chickens, like Tyson, Pilgrims Pride, or my favorite, Perdue. The larger producers exercise more quality control than smaller suppliers.
Next, decide what type of chicken you want. You can get a chicken 3 ways: live, fresh, and frozen. Live is best, but most people are too squeamish about killing one themselves for that to be an option. Likely, as not, a live chicken will wind up as a pet, rather than an entrée, so this is not much of an option. The next best is a fresh chicken, meaning that it is not frozen. This is a good option if you plan to cook it within the next few hours. If not, then you need a frozen chicken.
For fresh chickens, make sure the cooler they are kept in is at least 40 degrees F or cooler, the bird is tightly wrapped with no leaks or tears in the package, and it is within its Sell-By date. Never buy a chicken with a strong ‘birdy’ smell.
For frozen chicken, be sure it is rock-solid frozen, with no tears or rips in the package, and it is within the Sell-By date. Select your chicken at the very end of your shopping trip to insure that it stays cold as long as possible.
When checking out at the counter or register, be certain that your chicken is not bagged, or has any physical contact with any other unwrapped groceries, like produce. Chicken should be bagged separately from all other groceries.
You should go directly home, and place your chicken in the cooler, or freezer as soon as possible. Your chicken should not be out of a cooler or freezer for more than 30 minutes. Never re-freeze a thawed chicken. When handling chicken, wash your hands before touching anything else, and do not use any utensils, knives, cutting boards, rags or towels that have had contact with raw chicken, or juice, on anything else until after they are washed in very hot water, and chlorine bleach.
How to cook a whole chicken depends on what you want the end result to be. There are many different ways to prepare a whole chicken, but certain tips and guidelines are common to all methods.
Never leave a chicken out of the cooler or freezer for more than 30 minutes. You can cook a whole chicken without even thawing it out. Just multiply the cooking time by 1-1/2. If you are going to thaw a bird out in the sink, clean the sink out very well with a chlorine bleach solution of at least 10% first, place the chicken in very cold water, and change the water every 30 minutes. Freezers should be at, or very near 0 degrees F.
If you plan to use the microwave to thaw your chicken (not recommended), follow the manufacturer’s direction. When thawing in the refrigerator, allow 5 hours per pound. If you are thawing the bird in the sink, allow 30 minutes per pound. After the bird is thawed, examine it closely. If there is any gray coloring, slime, sour, or strong ‘birdy’ smell, return it to the store. Do not use it. If all is well with the chicken, make sure you cook it the same day it is thawed.
Always remove the bag inside the cavity of the bird, that contains the neck, liver and gizzards before cooking, and wash the bird inside and out thoroughly. Avoid cross-contamination of towels, knives, cutting boards, etc… Wash your hands before handling any other foods or utensils. Once your chicken is thawed, get it prepped and in the fire as soon as possible. Never leave a chicken sitting out more than 30 minutes.
Always truss a chicken if you are stuffing it, or putting it in a rotisserie. This keeps the stuffing in the bird during cooking, and keeps the legs and wings from hitting the heating elements and burning as it spins in a rotisserie. It also helps the entire bird to cook evenly.
Most importantly, never serve any chicken until it has an internal temperature at the thickest point, of at least 180 degrees, or if smoking it, 165 degrees F.
Always allow a cooked chicken to ‘rest’ for 10-15 minutes before serving. This allows the juices to settle, and the flavors to develop more fully. It also keeps your dinner guests from burning their lips and mouths on very hot chicken.
There are many opinions on how to cook a whole chicken. They can be roasted, baked, cooked on a rotisserie, slow cooked in a crock pot, pressure cooked, boiled, steamed, grilled, smoked, or even cooked on a campfire. There are several tricks common to all of these methods.
- Assemble all of your ingredients, and tools you will need before prepping the bird.
- Turn on the oven, start heating the water for boiling or steaming, or fire up the grill or smoker before starting to prep your bird. Then, they will be ready to cook when the chicken is.
- Make any basting sauces or glazes up ahead of time. If your are stuffing the chicken, have the stuffing mixed and ready to go.
- When cooking a chicken, temperature is more important than time. Use a meat thermometer to monitor the chicken’s internal temperature. It is done when it is at 167 degrees F if smoking, or 180 degrees F for all other methods.
- If you intend to remove the skin, do it AFTER cooking. Otherwise you will end up with a dry, tough, inedible bird.
- If you are going to use the marinade, or brine as a baste, sauce, or gravy, boil it before reusing it.
- When brining a chicken, always do it in the refrigerator. Never leave a raw chicken out of the cooler for more than 30 minutes.
- Save the carcass, bones, skin and any unused parts. Pick as much meat as possible from them, and use that later in chicken salad, soup, etc… The bones, skin and carcass can be placed in boiling water with spices for an hour or so, then removed and discarded. The remaining liquid is chicken stock, known to most kitchen professionals as ‘liquid gold’. This can be used in soup, gravies, for cooking rice, potatoes, etc
Different cooking methods require some different tricks of the trade:
Brining a Whole Chicken
I learned to cook at a very early age, and I remember that anytime anyone was going to roast, bake, smoke or barbecue a chicken, or turkey, they always brined it first. It seems to have gone out of style in these days of fast food, and instant gratification, which is a shame. A brined chicken or turkey is very much superior, with a full robust flavor and juicy, tender meat. It is a lost cooking secret.
The word ‘Brine’ refers to any liquid with a high salt concentration. Brining works by a process called osmosis. Poultry has little natural salt in its tissues, so when it is surrounded by a high-salt liquid, a chemical reaction takes place to attempt to equalize the amount of salt on the inside with that of the outside, drawing the salt and the water into the tissues and saturating them. If there are any herbs, spices and other flavorings in the water, they go into the tissues as well. This results in a very moist, plump, ultra tender bird, with a full, complex flavor.
Brining is easy, and just takes a little extra time and planning ahead. Use a large bowl that can be covered, or bucket with a lid, that will fit in the refrigerator. You can also use a marinating bag, but I have never been happy with the results using these. For a chicken up to 10 pounds, usually a gallon of water is plenty. You just need to cover the bird. If needed, you can place a weight in a zip lock bag, and insert it into the body cavity to keep the bird submerged. Just remember to take it out before cooking. Place the chicken in the bowl, or bucket, and prepare the brine.
The amount of salt to add is easy. The proper ratio is 1:16, or 1 cup of salt to a gallon of water. Dissolve the salt in the water, add your spices and flavorings, and slowly pour it over the chicken. Place a lid on it, and set it in the refrigerator for 4-6 hours prior to cooking, turning it over every couple of hours. The rule is to soak it for 45 minutes per pound of weight. When you are ready to cook it, just remove the bird from the brine, pat it dry inside and out, and use your favorite recipe. Do not re-use the brine, or let it come into contact with anything else. Discard it immediately.
Trussing a Chicken
I never cook any chicken without trussing it, unless it is going to be in a liquid, such as boiling, or in a pressure cooker/crock-pot/slow-cooker. This is another chef’s secret. If you do not truss your chicken or turkey, heat accumulates in the body cavity, causing the breast to get done before the rest of the chicken, so that it becomes dry and tough by the time the rest of the bird is finished. Trussing eliminates this problem. It also holds the legs and wings in close to the body so that the entire bird cooks evenly. It helps the bird keep its shape, especially when on a spit in a rotisserie. And lastly, if you are stuffing the body cavity, it keeps the ingredient inside the bird. Another good trick to keep the breast from becoming dry is to place lemon or lime wedges and onion quarters in the body cavity. These help to hold the moisture in, as well as imparting some wonderful flavors and aromas. To truss a chicken or turkey:
- Place the chicken on the counter, breast-side up, facing away from you (the body cavity opening will be facing away from you, and the drumsticks will be pointing away from you). Run your string underneath the tail.
- Bring the ends of the string up and cross them over the tail.
- Cross the strings under the tips of the drumsticks from the inside, then loop around them once and pull the strings tight.
- Turn the chicken over.
- Cross the strings over the back of the chicken or turkey, and center one string over each wing.
- Turn the bird back over.
- Pull the strings tight, pulling the wings against the body.
- Tie the strings in a knot and trim the loose ends as close to the knot as you can.
- Gently shake the bird a few times to make sure everything is secure.
Smoking a Whole Chicken
If you’ve never tasted a savory, smoked chicken, or turkey, then you have really missed out on one of life’s special treats It is one of my favorite cooking methods. Smokers can be purchased, or made very inexpensively. You don’t need anything fancy. It can be done on a standard grill, or Hibatchi if it has a lid. There are just two ‘secrets’ to perfect smoking: the bird must be cooked over indirect heat, and the temperature of the smoker must never exceed 255 degrees F, or drop below 240 degrees F. It’s a good idea to brine and truss your birds before smoking them.
Many different types of wood can be used, and experimentation will allow you to find your favorite. Here is a list of my favorite woods for poultry:
- Alder-mild with a slightly sweet overtone.
- Almond-sweet and nutty.
- Apricot-similar to hickory, but slightly milder. Good for when you don’t want as much ‘smokey’ flavor
- Cherry-sweet and very fruity.
- Cottonwood-mild, subtle and slightly woody. Works with all meats. A Texas favorite for camp-outs.
- Hickory-the undisputed King of Smoke Woods. Strong, pungent and ‘smoky’. Without hickory, there would be no bacon, or ham, and the world would be way less fun. Hickory can be used for all meats and fish.
- Mesquite-second only to hickory, strong, earthy and very woodsy. The absolute best for chicken, beef, and most game.
- Pecan-similar in character to oak, but milder, sweeter, and a little less ‘woody’. Great for chicken and fish
Soak your wood chips for several hours in water, then wrap them in foil packets and punch lots of holes in them. Then all you have to do is throw them on the coals periodically, and they last for hours.
To use a normal grill, put your charcoal on one side of the grill, and start it just as you would for grilling. You can adjust the temperature by the number of briquettes you use, and the air vent. When the coals are ready, throw a packet of wood on them, and put the bird on the rack on the other side of the grill, not over the coals. Now close the lid and find something to do for a few hours.
Check the temperature every so often, and rotate/flip the bird about every hour. Use a meat thermometer to monitor the internal temperature of the meat. The bird is done when the temperature of the meat is 167=175 degrees F.
The cooking time is about 1 hour per pound. If you are doing more than one bird, add 10 minutes per pound for each extra bird. Just average the weight between all the birds. So, for two birds, one 4 pounds, and the other 5 pounds, I would time them for 4-1/2 pounds, or 4 hours and 30 minutes. If you are going to add barbecue sauce, do it in the last 45 minutes of cooking.
Cooking times are approximate, and can vary by as much as 30 minutes, so go by the bird’s temperature, not the time. The trick to smoking is not to overcook the meat. It is OK to pull the bird just a degree or two shy of the mark, because it will continue to cook for a few minutes after being removed.
If you want to grill a whole chicken, use the same procedure, except you want the heat to be around 375 degrees, and cook the chickens for 15 minutes per pound, adding 5 minutes for every additional chicken. Flip and rotate the bird every 15 minutes or so. You can omit the smoke wood, or use it, your choice.
The last tip is that when you are removing the birds from the smoker, PREPARE FOR THE ATTACK! When I fire up the smoker, friends and neighbors (and sometimes even strangers) show up from nowhere, and tear into the birds like barbarians. There is something about smoked and griiled meat that brings out the Cro Magnon in all of us. It is satisfying on a very primitive level.
Roasting, Baking Rotisserie
These are wonderful ways to prepare whole chicken. They are pretty straight forward, so I’ll just list a few tips.
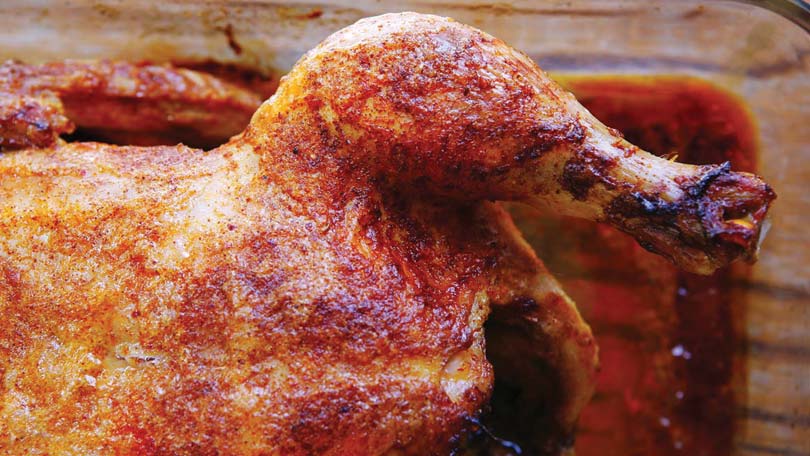
- There are those that advocate a 2-stage cooking process, where you roast the bird at 375 degrees until it is close to done, then turn the heat up to 425 to brown the skin. I have never been happy with the results of this, as it introduces too many variables. If the chicken is cooked properly, this is unnecessary. At 375 degrees, allow 30 minutes per pound, and check the meats internal temperature frequently. The chicken is done when the internal temperature is 180 degrees F, no matter how long it has been cooking. At 375 degrees, the skin will brown nicely, at the same time as the chicken is done.
- For the best results, brine and truss your chicken before cooking.
- Placing a pan of water in the bottom of the oven, or rotisserie will help keep the chicken breast from drying out. So will placing lemon/lime wedges and onion quarters in the body cavity. If dryness is still a problem, try covering the breast with foil for part of the cooking time.
- When roasting, use a roasting pan with a lid, or wrap the bird in foil to hold in flavors. If using foil, unwrap the bird for the last 45 minutes of cooking.
Pressure Cooking / CrockPot
A pressure cooker works just like a crock pot, but it uses pressure instead of time to accomplish the same purpose. The idea is to place the chicken in close proximity to vegetables and herbs, with water as a medium, and allow the flavors from the bird, veggies and herbs to infuse inside each other, creating a wonderful explosion of flavors, and tenderizing them in the process. This is the way to get the absolute most tender, moist bird possible. You can touch it with a fork, and the meat just falls apart. A crock-pot does this by using low heat to start the reaction, and time to allow it to complete. A pressure cooker does the same thing, except it uses pressure to force the infusion in a much shorter time. It is sort of like the difference between a drip coffee maker, and an espresso machine.
Whichever one you use, the procedure is the same. There is no need to brine, or truss the chicken. There is no way it is going to dry out, and the flavor has nowhere to go but in. Also, a lot of spices aren’t really needed, because the process allows the natural flavors to develop. A little salt, pepper, and maybe a dash of garlic and onion is more than enough. Just spray the inside of the cooker with non-stick cooking spray, and place the chicken in the bottom of the pot, then cut carrots, celery, potatoes, onions, and anything else you want in it in large cubes, and toss them in on top and around the bird. Throw in a pinch of salt, an pepper, and put the lid on. If it’s a slow-cooker/crock pot, just plug it in and set it on high for the first 4 hours or so. This raisss the temperature faster and allows less time for any bacteria to invade your supper. Lower the temperature after 4 hour or so, and let it cook 4-6 hours on high, or 7-10 hours on medium, depending on the size of the chicken. If you are into simple food, you can just place the chicken in a crock pot, forget the vegetables, and just throw min a pinch of salt and pepper, put the lid on and let it cook. The chicken will actually stew in its own juice. Absolutely wonderful! It doesn’t get any more fool-proof than this. You can even start it, then go to work, and it will be ready when you get home. It is difficult to over-cook in a crock pot/slow cooker. If you left it on when you went on vacation or something….maybe, but I’m not even sure about that.
Pressure cookers are a little more involved. You need to put a little water in the bottom to generate steam. Use the same procedureas for crock-pots, then follow the manual that came with your unit for pressures and cooking times. Every unit is different.
The two main things are not to let the food dry out, and not to open the lid until the pressure has dropped to the same as the room…unless you want to scrape your dinner off of the ceiling. You can remove the chicken from your crock-pot or pressure cooker with a pair of tongs and a large spatula, or spoon. Don’t worry if it falls apart. No one will care. You can de-bone it, pull it into pieces, or use the meat and stock in other recipes. Slow and pressure-cooked chicken is excellent with rice and mixed steamed vegetables.
Boiling a Whole Chicken
Boiling is a much under-rated and under-used cooking method, especially for chicken. Boiled chicken has a natural, savory deliciousness about it. It is like good Amish cooking; simple, hearty and wonderful. You do not want it overly spiced, so that the natural taste of the chicken comes to the front unadulterated. It is easy, and almost foolproof. The only way to mess this up is to let the water boil completely away, and burn the bird. This is unlikely, but not impossible.
To boil a chicken, get a pot large enough to submerge the chicken in. Place the chicken in the pot, completely cover it with water, and set it on the burner on high. Cut up celery, onions, and carrots if you like and drop them in with the bird. You can add a little salt and pepper, but don’t over-do it.
When the water boils, lower the heat to a low boil. Put a lid on the pot, and let it cook. Check the water level frequently and add more when needed. The chicken is done when you can touch it with a fork, and the meat falls off the bone. That is all there is to it. Remove the chicken carefully from the pot, using tongs, and a large spatula or spoon. Don’t worry if it falls apart. No one will care. Use the meat and stock as is, or pull the meat off the bones and use it in other recipes like chicken salad, etc
Microwave
Every microwave manual has a recipe in it for cooking chicken. It is possible, in theory anyway, to raise the internal temperature of a chicken to something that outwardly resembles cooking, with microwaves. This is a viable cooking method if you are really into dry, tough and tasteless.
Microwave ovens are invaluable for re-heating, melting butter, heating water, and cold beverages like old coffee and tea, quick-thawing some foods that can tolerate it, and even cooking eggs. However, for general cooking, it is a great way to ruin your food.
I have sampled the efforts of those brave and misguided souls who have attempted this. I cannot say that I would classify the results as exactly edible….abominable would be a more accurate description. Microwave Ovens are where food goes to die. If you want to save your chicken, find another way to cook it.
This is by no means a complete list of the possible ways on how to cook a whole chicken. Entire books can, and have, been written about cooking chicken. But maybe this will help get you started. Be bold, and don’t be afraid to experiment. If you follow these basic guidelines, and proper kitchen procedures, it is hard to mess up completely.
I hope you enjoy using these tips as much as I have writing them for you.


